

Create, edit, and manage booking pages
Create and customize booking pages with availability, scheduling windows, booking forms, and sharing controls.
Create and manage booking pages
Each booking page controls how people book time with you and your team, including the meeting duration, availability, scheduling limits, booking form, and sharing settings.
Connect a Google Calendar or Outlook Calendar to create a booking page. Bridge checks connected calendars for conflicts and to calculate available times. Connect a calendar.
Page statuses
| Status | What it means |
|---|---|
| Active | The page is live and accepting bookings. |
| Inactive | The host turned off the page, so it is not visible publicly. |
| Paused | The page is not accepting bookings because an issue requires attention. |
| Paused: calendar disconnected | The host's calendar integration was disconnected. Reconnect the calendar to resume bookings. |
| Paused: host removed | The host was removed from the workspace. Assign a new host to resume bookings. |
Create and edit booking pages
Select create New Page from the scheduling page. Bridge opens the booking page editor.
A connected Google Calendar or Outlook Calendar is required before you can create the page.
Select Edit on an existing booking page or select the booking page card.
You can change all booking page settings after creation, including the page identity, availability, scheduling windows, booking form, sharing, and integrations.
Workflow experience
On desktop, within the booking page creation and editing workflow, the editor uses a split-pane layout with settings on the left and scheduling previews on the right.
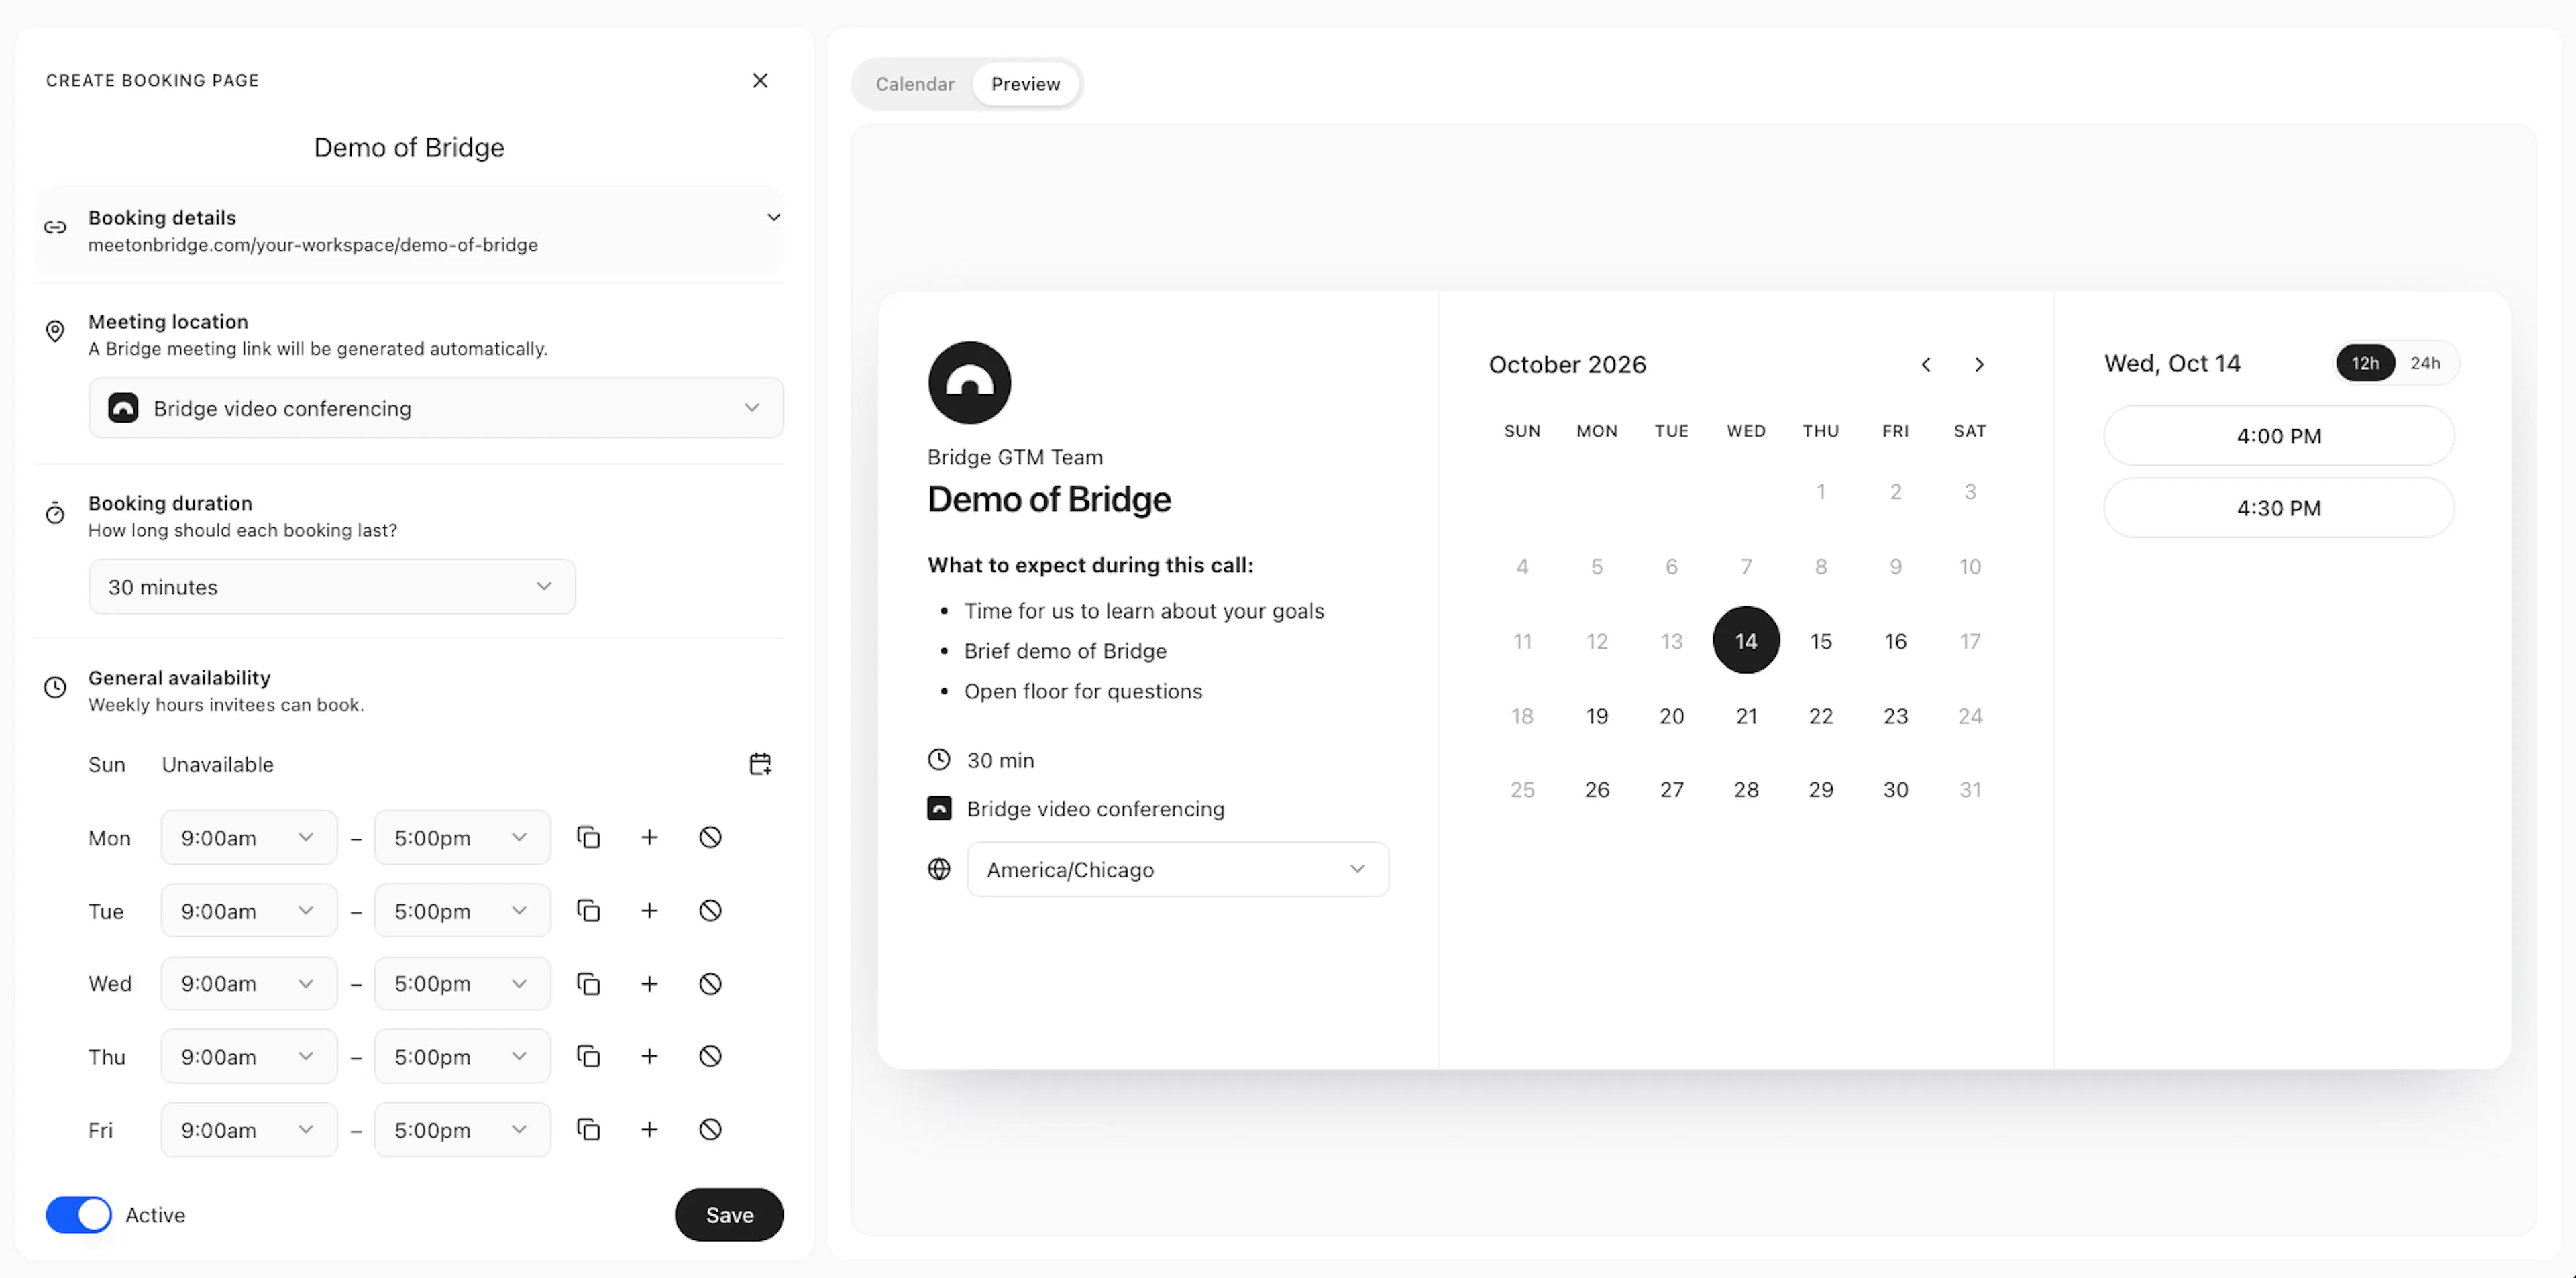
In the right panel, you will see scheduling previews for Calendar and Preview view:
- Calendar view: see a real-time view of your connected calendar and a live preview of your booking availability
- Preview view: see a preview of the booking page experience that visitors will see. You can walk through the full workflow without triggering bookings.
Configure the booking page identity
Set the information visitors see about the host and purpose of the booking.
- Title: The name of the booking page.
- Host avatar: Use the host's profile photo or your workspace logo.
- Host display name: The name shown to visitors as the meeting host.
- Description: Rich-text content that explains the meeting and gives visitors useful context.
- Public booking link: The unique part of the public URL (e.g.
meetonbridge/[workspace-name]/[booking-page-slug]).- Bridge uses the Workspace name as the base of the custom booking page URL. All workspace names are unique. See workspace details.
- Booking page names can be different from the booking page slug.
- Booking page slugs must be unique to the workspace. Bridge will automatically validate the slug, checks its availability, and suggests an alternative when the requested slug is already in use.
- The booking page name slug can be changed at anytime. Once a slug is changed, the previous booking link will point to an inactive page. Other booking pages can re-use previous slug names.
Configure the meeting
Bridge is the meeting location for every booking page. Select one of the standard meeting durations:
- 15 minutes
- 30 minutes
- 45 minutes
- 60 minutes
For a different duration, choose a custom value between 5 and 480 minutes. Enter the value in minutes or use the hours input.
Set weekly availability
Define when visitors can choose an appointment time.
- Toggle availability for each day of the week.
- Set start and end times in 30-minute increments.
- Add multiple time periods to a day.
- Add or remove availability periods.
- Mark a day available or unavailable.
- Copy one day's hours to every other day.
- Select the host's timezone.
- Let Bridge check connected calendars for conflicts before it offers a time.
Bridge combines your weekly availability with your calendar events, booking limits, notice period, and buffers. Visitors only see times that satisfy all of those conditions.
Set scheduling windows
Control how far ahead visitors can book and how much time you need around each appointment:
- Booking window: The number of days into the future that visitors can schedule.
- Minimum booking notice: The minimum number of minutes required before an appointment can start.
- Buffer before appointment: Time reserved before each appointment.
- Buffer after appointment: Time reserved after each appointment.
These settings prevent last-minute bookings and protect preparation or follow-up time around your meetings.
Customize the booking form
Name and email are always required on the booking form. Add other fields when you need more information before the meeting.
Available optional and custom fields include:
- Short text
- Long text
- Phone number
- Guest email collection
- Use Guests to collect additional attendee email addresses in a comma separated format
Each optional field has a required or optional setting. You can add, edit, and remove fields, then drag and drop them into the order visitors should complete them.
Set the active state
Use the page's active toggle to control whether visitors can book:
- Active: The page accepts bookings and is available through its public link.
- Inactive: The page stops accepting bookings and is hidden from public access.
- Changing a page to inactive does not remove its configuration. Use inactive for drafts or if a booking page should no longer be available for bookings. Reactivate the page when you are ready to accept bookings again.
Share a booking page
Use the sharing controls to determine which workspace members can discover and access the page within your workspace. This is for internal collaboration and does not impact public links.
General access options are:
- Only people with access: Restrict the page's workspace listing to people who have been granted access.
- Everyone in the workspace: Make the page available to everyone in the workspace.
Use the booking page editor
The editor combines configuration and scheduling previews so you can review changes before saving.
On desktop, within the booking page creation and editing workflow, the editor uses a split-pane layout with configurable inputs on the left and a calendar or preview panel on the right.
- Resize the panels to give more space to the settings or scheduling previews.
- The editor uses a mobile-specific layout on smaller screens.
Use the right panel controls to:
- Toggle between Calendar and Preview views.
- Navigate between weeks.
- Review available times in the calendar.
- Interact with the embedded public booking preview.
- Check how visitors will complete the booking form.
Bridge detects unsaved changes and protects you from losing them when you navigate away or close the browser. If you leave with unsaved changes, choose Save and continue to keep your changes or Continue without saving to discard them.
Connect HubSpot
Use the HubSpot settings to synchronize booking activity with your CRM. You can configure Bridge to:
- Create a HubSpot contact from the primary attendee.
- Create a HubSpot meeting record.
- Associate the meeting with the attendee's contact.
- Map booking information to HubSpot contact properties.
Contact-field mappings support dynamic values such as utm:source, utm:medium, utm:campaign, utm:term, utm:content, and answer:questionId. Add up to 25 mappings, search available HubSpot properties, and remove mappings you no longer need.
Connect HubSpot and configure synchronization from CRM integrations.